The purpose of this page is to provide some specific installation information related to Mobile Work Order.
An overview of IFS Mobile Work Order functionality and permissions sets activity grants required to run the application can be found here (end user documentation).
Mobile Work Order is designed to run against the latest version of the Touch Apps Server (TAS). If operating Mobile Work Order on premise then it is important to keep the TAS up-to-date with the latest release of the TAS. Documentation on the TAS can be found on the web site IFS Touch Apps Cloud - Downloads.
Configuration exists to control the synchronization of Objects and Parts. To view this logon to the TAS and select to configure Mobile Work Order. Documentation on the TAS can be found on the web site IFS Touch Apps Cloud - Downloads.
If all Equipment Objects registered in IFS Apps are required to be synchronized then the configuration to "Sync all Objects" should be set.
If all Parts (Inventory, Sales and Purchase Parts) registered in IFS Apps are required to be synchronized then the configuration to "Sync all Parts" should be set.
If the historical work orders of all Equipment Objects registered in IFS Apps
are required to be synchronized then the configuration to "Sync all Objects" and
"Sync WO History for All Objects" should be set.
Cloud resources where
the default where clause is changed when the option "Sync all Objects" is
selected:
Cloud resources where the default where clause is changed when the option
"Sync WO History for All Objects" is selected:
Note 1: These settings should only be set if the system can handle the numbers of parts and objects that will be synchronized. If thousands of records will be synchronized by enabling this configuration then the Basic Data for Mobile Part Basic Data and Mobile Object Synchronization Data should be set-up.
Note 2: Only the parts and equipment objects that the end user has site access to will be synchronized.
Before the manual steps to finalize the Mobile Work Order install are followed ensure that:
The following steps must be taken to finalize the Mobile Work Order install:
http://<server>:<port>/client/touchapps/mwo.zip
Note: The <server>:<port> is the same as the IFS Home Page.
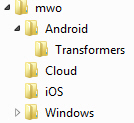
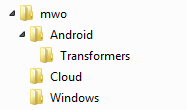
Extract the mwo.zip files to the local host. This should contain the below file structure:
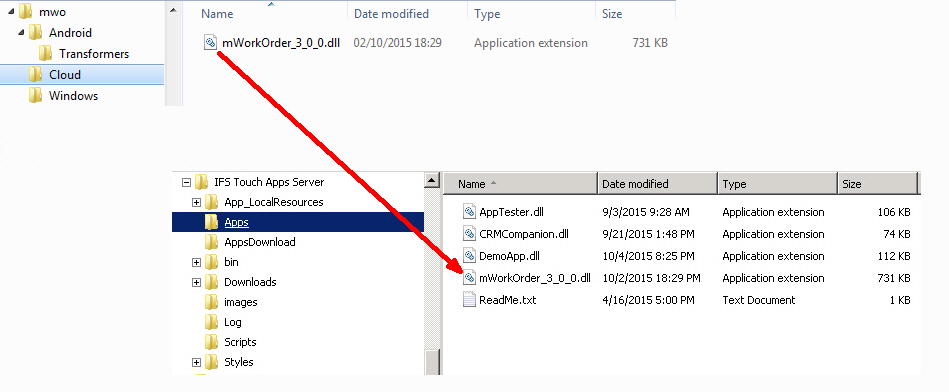
Copy the dll files from the mwo\Cloud folder to the TAS installation IFS Touch Apps Server\apps folder as shown below:
Logon to the TAS Console and Enable the new mWorkOrder version. Documentation on how to do this can be found on the web site IFS Touch Apps Cloud - Downloads.
Note: If the mobile users will receive the client files via an MDM or a private store or a custom process then the install can stop at step 5. If distributing the client files via the TAS download page then continue with the install steps.
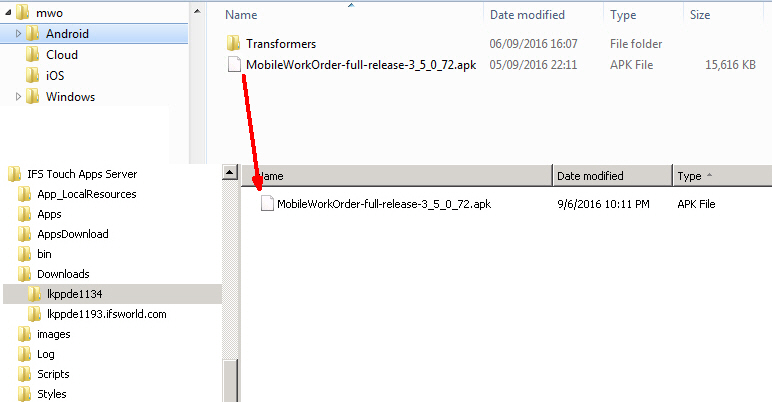
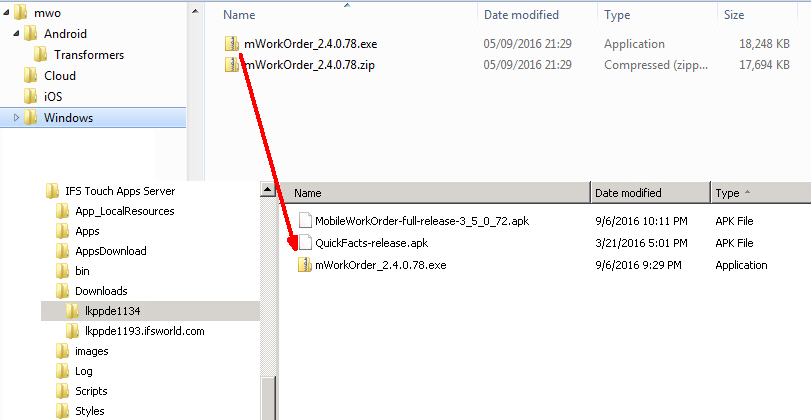
If using the Android client, copy the Android APK files from the mwo\Android folder to the TAS installation IFS Touch Apps Server\Downloads\<SystemId> folder as shown below:
Note 1: In the above screenshot the <SystemId> of lkppde1134 is used as an example. The first time a System ID is registered in the TAS console a new folder will be created as IFS Touch Apps Server\Downloads\<SystemId>
Note 2: If installing an Upgrade then the previous APK file should be removed to avoid confusion on which version the mobile users should download.
Optional Step if using Mobile Work Order and Quick Facts Touch Apps together.
Copy the Transformer APK files from the mwo\Android\Transformers folder to the TAS installation IFS Touch Apps Server\Downloads\<SystemId> folder as shown below:
Note 1: In the above screenshot the <SystemId> of lkppde1134 is used as an example. The first time a System ID is registered in the TAS console a new folder will be created as IFS Touch Apps Server\Downloads\<SystemId>
Note 2: If installing an Upgrade then the previous APK file should be removed to avoid confusion on which version the mobile users should download.
If using the Windows client, copy the Windows EXE file from the mwo\Windows folder to the TAS installation IFS Touch Apps Server\Downloads\<SystemId> folder as shown below:
Note 1: In the above screenshot the <SystemId> of lkppde1134 is used as an example. The first time a System ID is registered in the TAS console a new folder will be created as IFS Touch Apps Server\Downloads\<SystemId>
Note 2: If installing an Upgrade then the previous EXE file should be removed to avoid confusion on which version the mobile users should download.
Note 3: The .ZIP file contains the Install Files for the Windows Client that can be used via an MDM or an Enterprise Store.
If using the iOS client, copy the iOS IPA and PLIST files from the mwo\iOS folder to the TAS installation IFS Touch Apps Server\Downloads\<SystemId> folder as shown below:
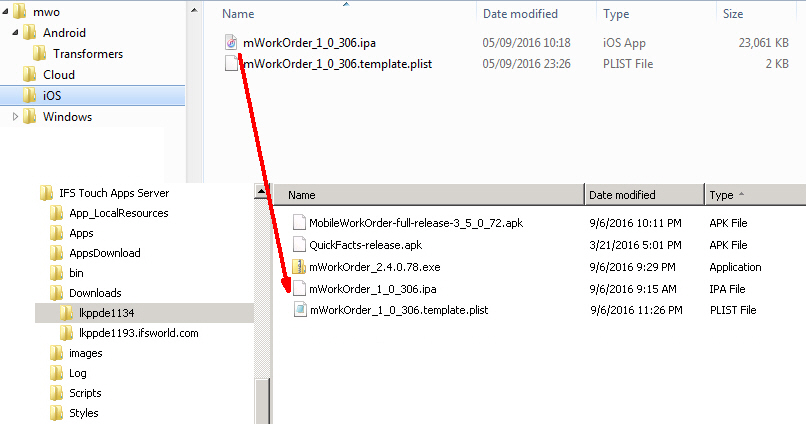
Note 1: In the above screenshot the <SystemId> of lkppde1134 is used as an example. The first time a System ID is registered in the TAS console a new folder will be created as IFS Touch Apps Server\Downloads\<SystemId>
Note 2: If installing an Upgrade then the previous IPA and PLIST files should be removed to avoid confusion on which version the mobile users should download.
Note 3: On first navigating to the TAS Download page (in Step 10 below) a PLIST file will be generated based on the TEMPLATE.PLIST file.
Navigate to the below URL for the TAS Download page replacing the <TASserver> and <port> with the server and port of the TAS Installation
http://<TASserver>:<port>/Downloads.aspx
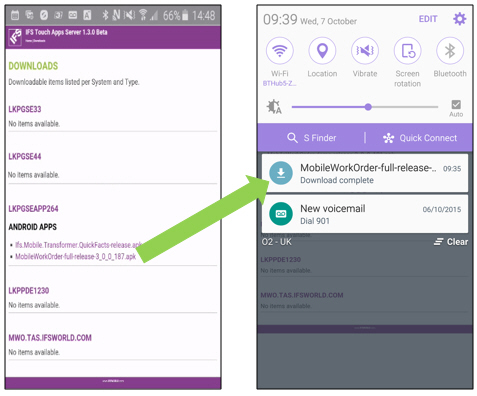
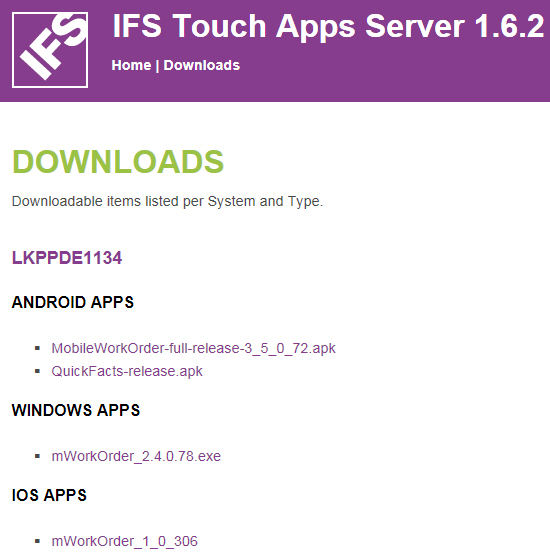
Confirm that the clients are available to download.
This should display the clients as downloadable links as shown below:
A URL should be created that exposes the TAS to the mobile users so they can download the clients and synchronize with IFS Applications
Before the manual steps to finalize the Mobile Work Order install are followed ensure that:
http://<server>:<port>/client/touchapps/mwo.zip
Note: The <server>:<port> is the same as the IFS Home Page.
Extract the mwo.zip files to the local host. This should contain the below file structure:
Distribute the client files to the mobile users via an MDM or a private store or a custom process.
If distributing Mobile Work Order via an MDM or a private store or a custom process then not all of these installation steps will be relevant.
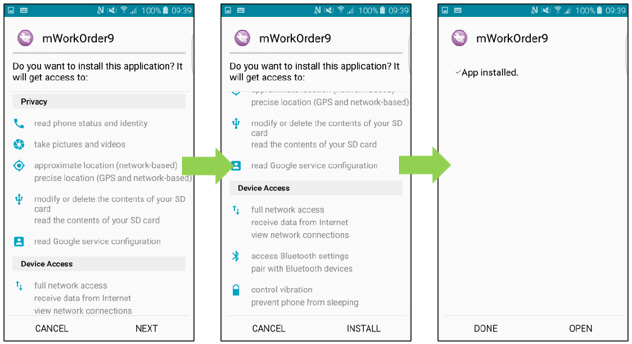
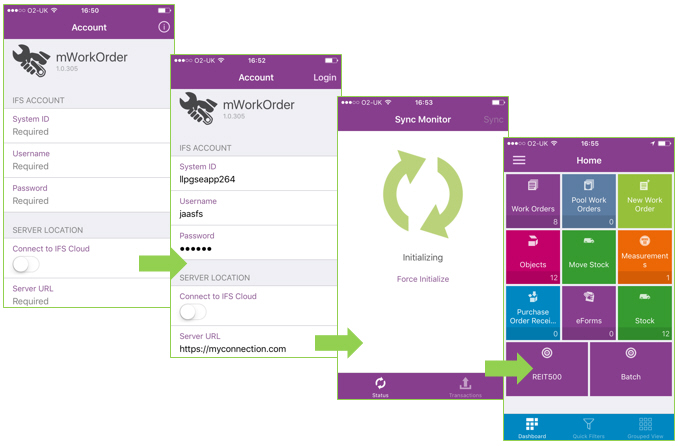
Before installing the Android client ensure that:
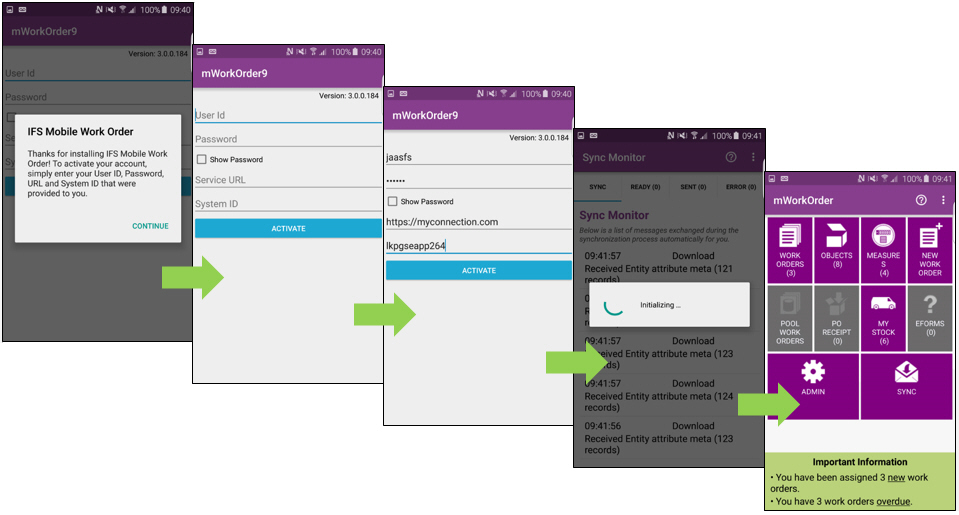
Note 1: The System URL is the URL to connect to the TAS. If connecting from outside the internal network then this will need to be an external connection that routes to the TAS.
Note 2: The home screen may be different depending on the permission set Activities that have been granted to the mobile user.
Before installing the Windows client, ensure
The client is running Windows 8.1 Pro with update 2919355, or Windows 10 Home, Windows 10 Pro or Windows 10 Enterprise.

Note 1: This is a self-extracting installer, and when run, will verify that the client is suitably configured
Note 2: During the process, a security certificate may need to be installed. This is done by the installer, but will require user permission to complete the task. If using an account that is a member of the local administrators group, a simple dialog may appear.
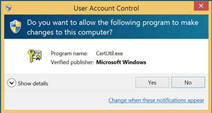
The Yes option must be selected, to allow installation of the certificate.
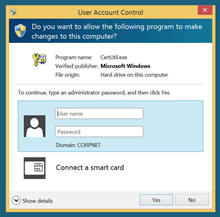
If the account is a member of the local administrators group, then a different dialog will appear, and an account which is a local administrator, along with the appropriate password, must be entered in order for the installation of the certificate to succeed.

Note: The System URL is the URL to connect to the TAS. If connecting from outside the internal network then this will need to be an external connection that routes to the TAS.
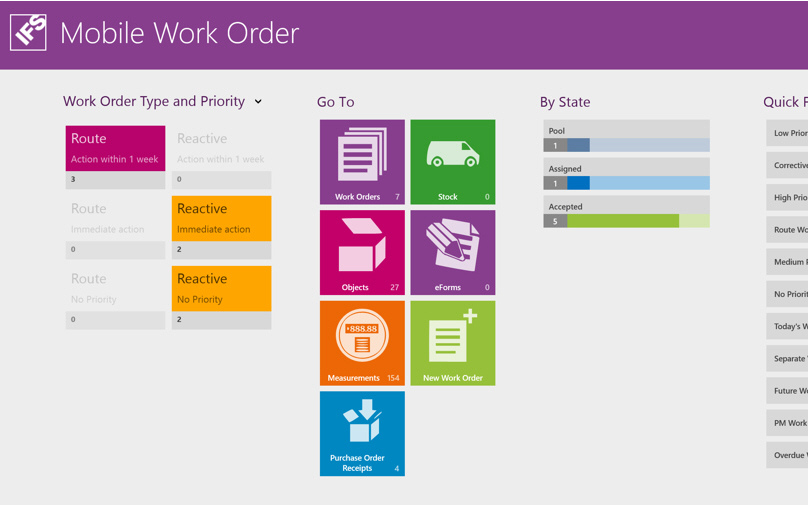
Note: The home screen may be different depending on the permission set Activities that have been granted to the mobile user.
.
If distributing Mobile Work Order via an MDM or a private store or a custom process then not all of these installation steps will be relevant.
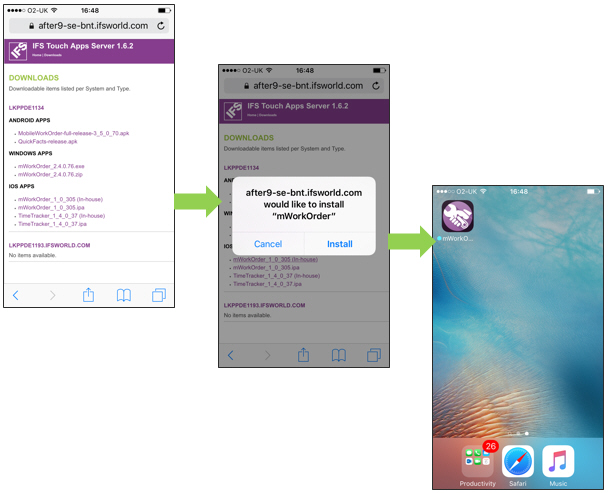
Before installing the iOS client ensure that:
Open the Settings app on your device
Select General Select 'Profile' or 'Device Management' or 'Profiles & Device Management'
Click 'IFS World Operations AB'
Click 'Trust "IFS World Operations AB"
Click 'Trust'
Open the App again
Note 1: The System URL is the URL to connect to the TAS. If connecting from outside the internal network then this will need to be an external connection that routes to the TAS.
Note 2: The home screen may be different depending on the permission set Activities that have been granted to the mobile user.